VW

The First Drive


I got the bus out for my first drive today!  As you can see from the video, it starts up fairly well, and it looks pretty awesome. The tires were a little squeally, but the thing runs.  The end of the clip makes you think I kept driving off into the sunset!

What actually happened was a loud clunk clunk clunk was soon heard potentially coming from the front passenger wheel.  I pulled into an empty section of parking lot to turn around, and the bus promptly died every time I let off the clutch to go into reverse.  I’m now stuck halfway in a parking spot, Wifey is miffed, neighbors are gawking, and the stupid bus won’t shift into gear!  Finally, after putting it in neutral and shifting back to reverse, it shuddered backwards and I was able to shift into first and head back to the garage.  I killed the engine again while turning into the garage.  Again the engine stalled every time I let off the clutch (and applied gas – I’m not that dumb).  Finally, after putting it in neutral again and shifting back to first, it engaged and I was able to pull back into the garage and shut off the engine.

Whew – pretty much a total failure for a first drive, but I feel like I learned more about the bus today.  I’m going to jack up the front to see if I can better understand the loud clunking noise.  I’m going to keep messing with the shifter to see if I can figure out why it won’t always engage.  I’m also going to figure-out how to connect the e-brake cables.  Even though my first drive in the bus consisted of driving 100 ft down the parking lot and limping back to the garage, I was happy with how the engine started up and ran.  If I can fix that, I can fix the rest of this thing!

VW

Back in ‘Bus’iness

Bus Turn Signal Dash

I finally got around to getting some more work done on the bus today.  A little vacation, a little work, a little watching Breaking Bad… today I put all that aside and set about getting the bus drivable!

I began by just starting up the engine to make sure this thing still runs – it doesn’t.  Well it starts up, but won’t idle at all.  I have to keep my foot on the gas, and continually increase the throttle. Not good!  I don’t know why this would happen, it was running fine before, I haven’t changed anything, I don’t know what I’m doing, I’m tired of nothing ever working out – those were the thoughts running through my head – but I tried to stay positive!  I decided first and foremost to do another little mini-tune up.  I checked the static timing – it was fine – and I checked the valves again.  They were all pretty loose, so maybe I didn’t adjust them correctly last time.  Ok valves all set, timing is right, battery charger hooked up – engine still can’t idle.  Now I’m pissed – I throw a really great tantrum all by myself in the garage, and eventually start banging various spots around the engine with my wrench. Stupid bus, if it wants to act this way, I’ll just hit it… repeatedly!  Thats when I noticed that this thing on the right side of the carburetor was loose, and the three screws holding it in place had almost fallen out. A little bit of googling learned me that this thing is the automatic choke, and when not adjusted correctly can screw up the fuel-air mixture running into the engine.  I found this site with adjustment instructions, and I was back in business!

Auto Choke Close 2

With the automatic choke properly adjusted and tightened, the engine sounds better, and idles just fine – Success!  Now I can move on to figuring out why the battery won’t charge.  In my last post, I mentioned that I needed a new voltage regulator – well the shop I ordered it from in California never shipped it. I was frustrated for a bit, but then realized I can get exactly what I need from NAPA – with no shipping – lesson learned, I will always check Autozone and NAPA for parts instead of just assuming that I need some special ordered thing!  I also bought a new battery from NAPA – and made a few trips for wire connectors and carb cleaner – yeah so they saw me a few times today.

Regulator Compare

I removed the old voltage regulator, replaced the corroded connections, cleaned the battery cable connectors, and thoroughly sprayed the inside of the generator with electrical contact cleaner.  Hooked everything back up including new battery, polarized the regulator by almost shocking myself, and started the engine – indicator light still on!  I’m pissed, throw another decent tantrum, go inside to tell Noelle that we are screwed and the project is a failure, watch another episode of Breaking Bad, then go back out to the garage.  Start up the engine again, but this time I rev it high and loud – the light instantly goes out!  I leave the bus in idle and go back to check the battery with the multi-meter (I know how to use it now – wires were backwards last time…oops) the battery seems to be charging. Success! 

I now have a fully functioning VW bus – turn signals work, brakes and brake lights work, headlights work, tires are in good shape, battery is brand new and charges, and the engine starts right up and runs until I tell it not to.  I’m totally stoked, and maybe – just maybe – I’ll be driving this thing around town soon, better watch out!

VW

Getting My Hands Really Dirty

Oil New

I changed the oil today.  It was quite the experience – and I don’t think I fixed the leaking drain plate – but oh well, this marks the end of the first tune-up.

I started yesterday by double checking all of the valves again.  They were making just a little bit more noise than I thought normal (Here is an interesting page that has engine sound recordings from John Muir himself), so I decided to tighten them to .004″ instead of .006″.  After doing so, the engine sounds great, and I noticed it remained much cooler!  It did die once while idling (I’m thinking I need to clean the carburetor), but handled steady high RPMs, and sudden acceleration with no hesitation.

Generator

I then moved on to the generator.  My battery still isn’t charging, and so I wanted to make sure the generator was actually working.  I suspected it was because the engine still ran when the battery was disconnected, but I tried to check it anyways.  I say “tried” because I couldn’t figure out how to work my electronic multi-meter.  I googled all the different settings but nothing seemed to work!  Stupid multi-meter. Instead I ‘polarized’ the generator by grounding the DF wire and connecting the D+ wire to the positive battery terminal.  The thing spun around quickly and sparked so I know it works.  I’m going to get a new voltage regulator and see if that solves anything.

Oil Draining

Finally, I got to the oil change.  The drain plate has been leaking since I parked the bus in the garage, and I noticed today that the oil level was dropping.  I got everything started by running the engine for about 5 – 10 minutes – let it sit for a while, use the 21mm wrench to unscrew the drain plug, unscrew the last bit by hand – OUCH, WTF! – hot oil covers my gloved hand and I drop the drain plug in the oil pan.  Oops!  I didn’t actually burn myself but came pretty close.  Stupid oil.

I waited for the oil to drain, cleaned the parts, put my new gaskets and washers on, and re-attached.  Small problem – two of the screws came loose from the oil sump and are probably not able to be reseated – I’m blaming the previous owner again – he didn’t use any washers, probably noticed the thing leaking, and torqued the nuts way to hard. Basically this is basic VW air cooled oil change 101 stuff, but I’ll stop before I start ranting again.  I got everything put back together, but the drain-plate wasn’t sitting exactly flush with the oil sump, and I think it still leaks.  I’ll know for sure tomorrow – looks like I need to be buying more gaskets!

Oil New Gasket

Today I essentially completed the tune-up activities (except for compression test which I’ll do when I get a new battery).  The engine is running much better than when I started, and I’m pretty stoked about that – hopefully more progress to report soon!

Uncategorized, VW

Getting My Hands Dirty

Valves Hands

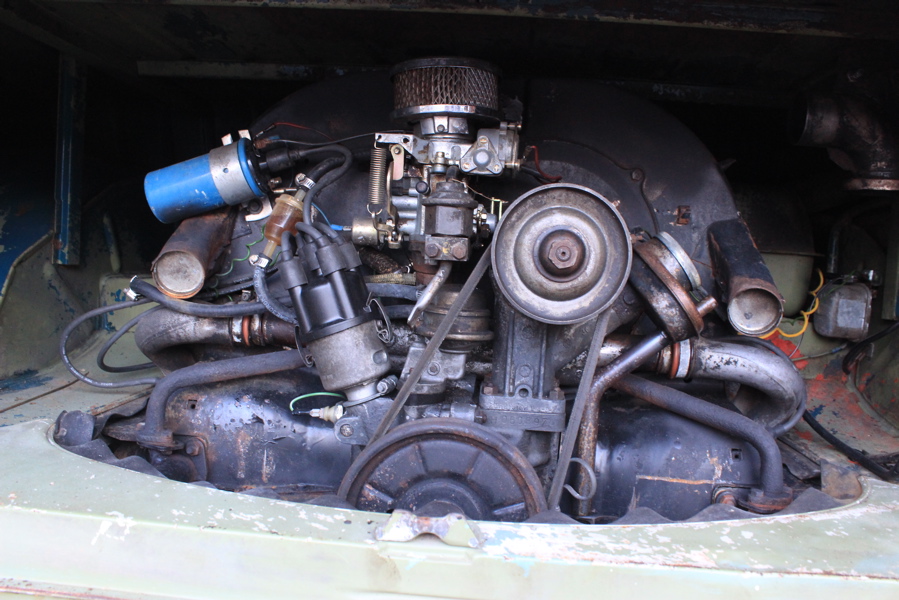
Today, I tuned the engine.  I’ve been pretty nervous to start messing with the engine and all of its parts.  It runs, and I don’t want to do anything to stop that.  I also apologize in advance for the techiness of this entry; If you don’t know what I’m talking about, just skim it and be impressed with my massive mechanical knowledge.  If you happen to be a VW nut, keep me honest and tell me all about how I am doing everything wrong. As I mentioned earlier, I ran the engine for about 10 – 15 minutes the other day, and didn’t really like the way it sounded. It also seemed to get pretty hot.  So now I’m going to tune it up and make sure everything is set correctly!

I started the day on a shopping spree:  Auto Zone, Menards, NAPA, other Auto Zone, back to NAPA.  I have been researching the steps needed to tune an air-cooled VW engine via the Muir book, internet resources, and many You Tube videos.  What I planned to accomplish today was 1) Replace fan belt, 2) Adjust timing, 3) Adjust rocker valve gaps, 4) Change oil, 5) Check compression, 6) Start up bus and drive off into the sunset.

New Belt

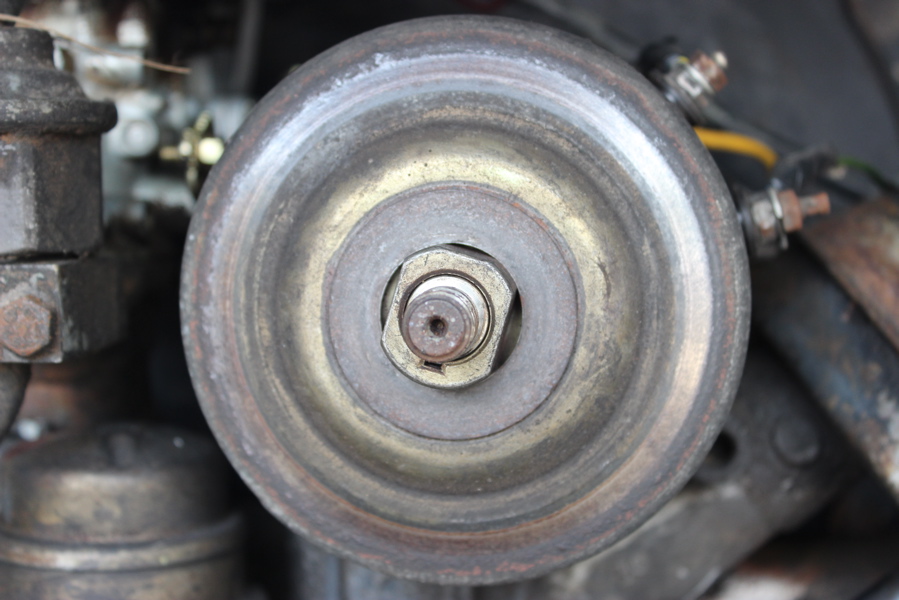
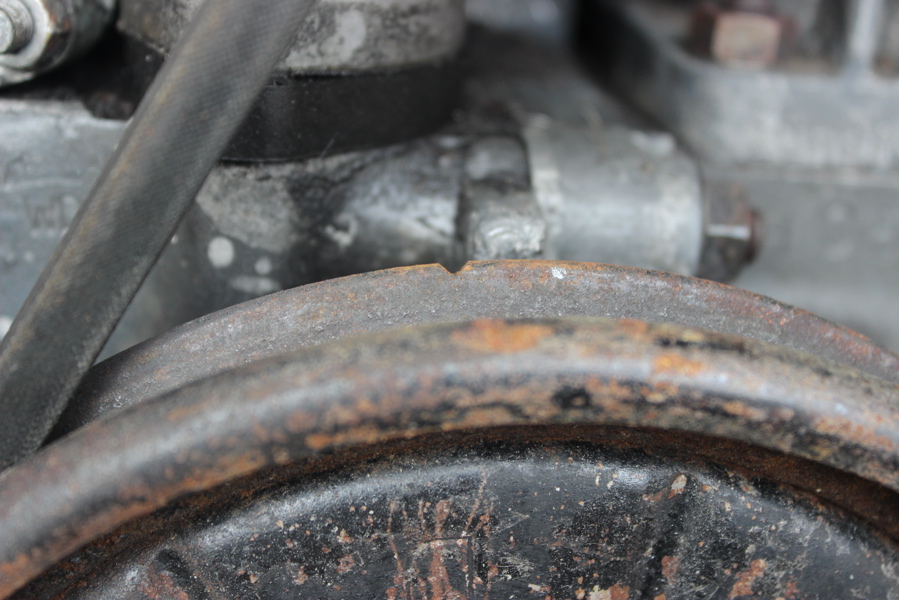
I found the belt I needed at NAPA; they had the exact 10x905mm size I needed, Yay!  However, when I loosened the generator pully, I noticed that, of course, my engine only has 6 shims instead of the 10 that it should have.  More shims means wider pully gap, which allows for a smaller belt.  I would have needed at least 8 shims to handle the new belt, so instead I kept the old one and removed some shims to tighten it.  Its not perfect, but is definitely not as loose as it was before.

Generator Pully Off

Engine Belt Old

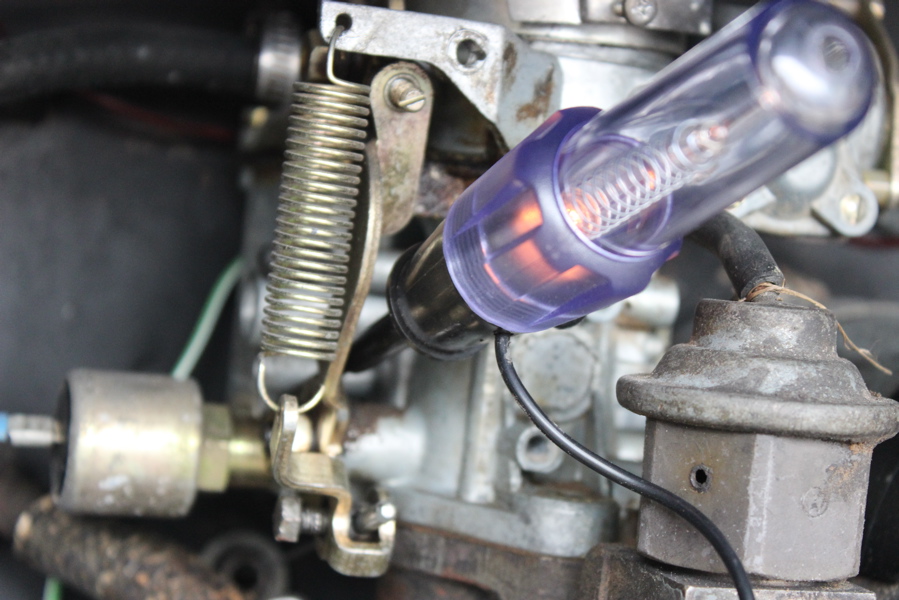
Adjusting the timing was actually very easy, and didn’t really need done.  I found the notch in the crankshaft pully indicating top dead center (TDC).  Because I have a 009 centrifugal distributor, I know that 7.5 degrees before TDC is when cylinder #1 is in firing position.  I made a pencil mark at this point, and when I flipped the key in the ignition, the test light light up bright – the engine appears to be properly timed – a good start to this tune up!

TDC

Timing Light

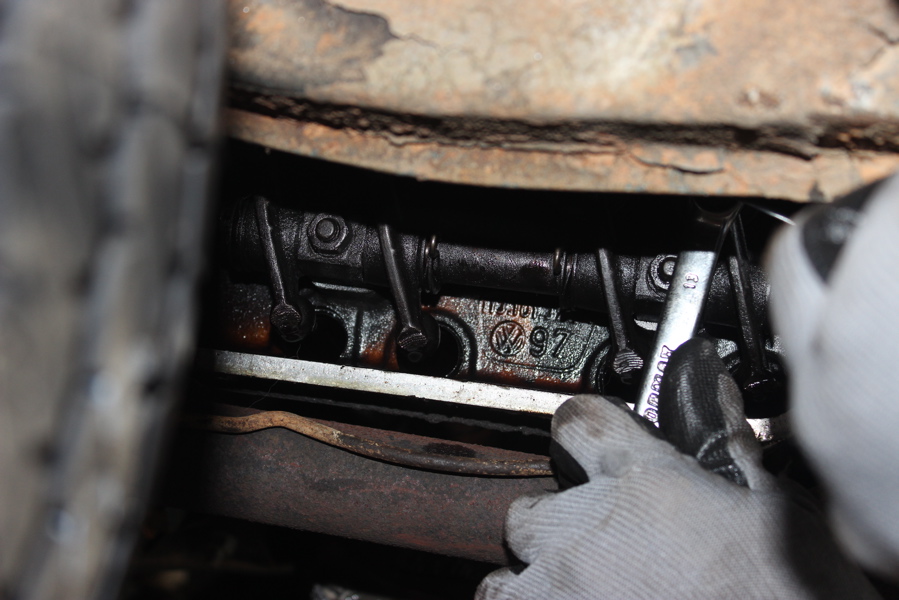
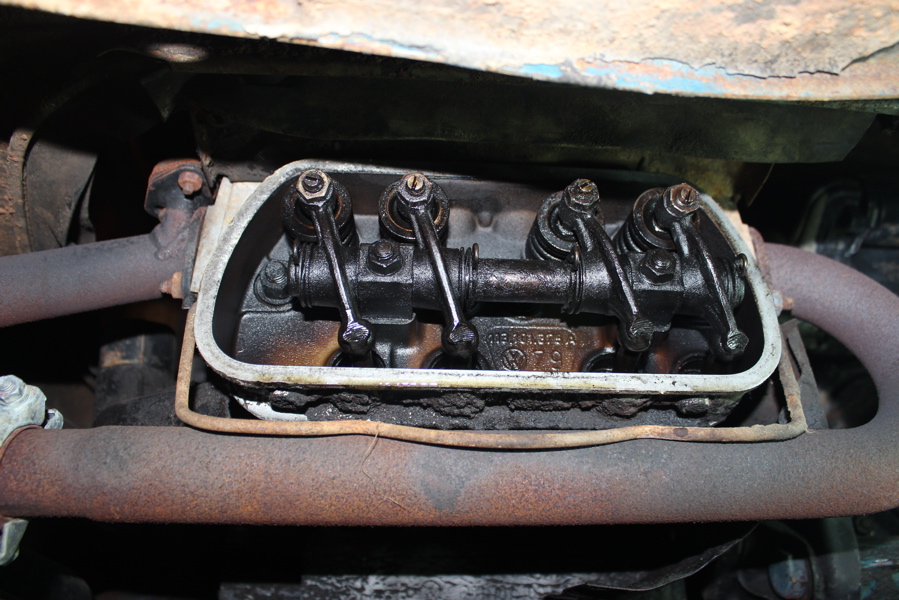
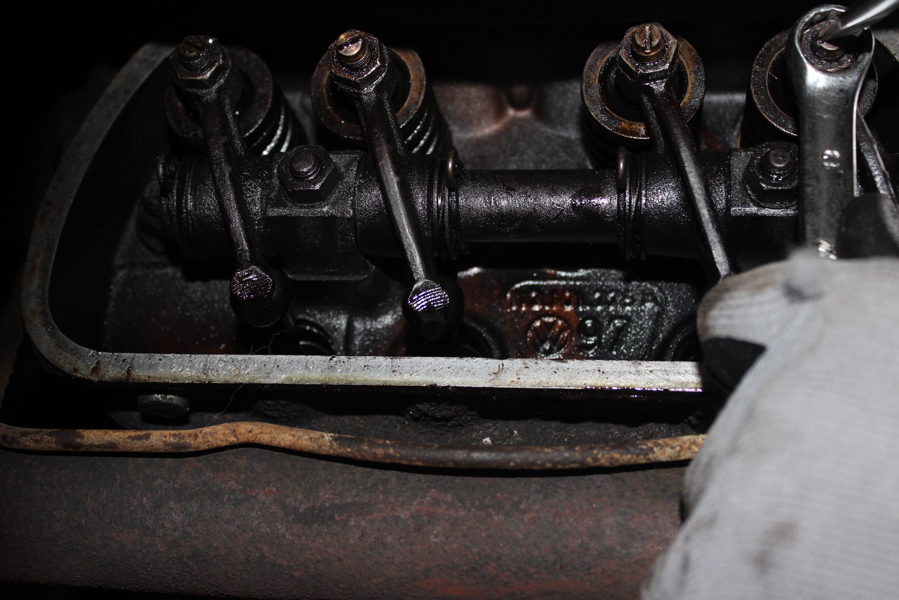
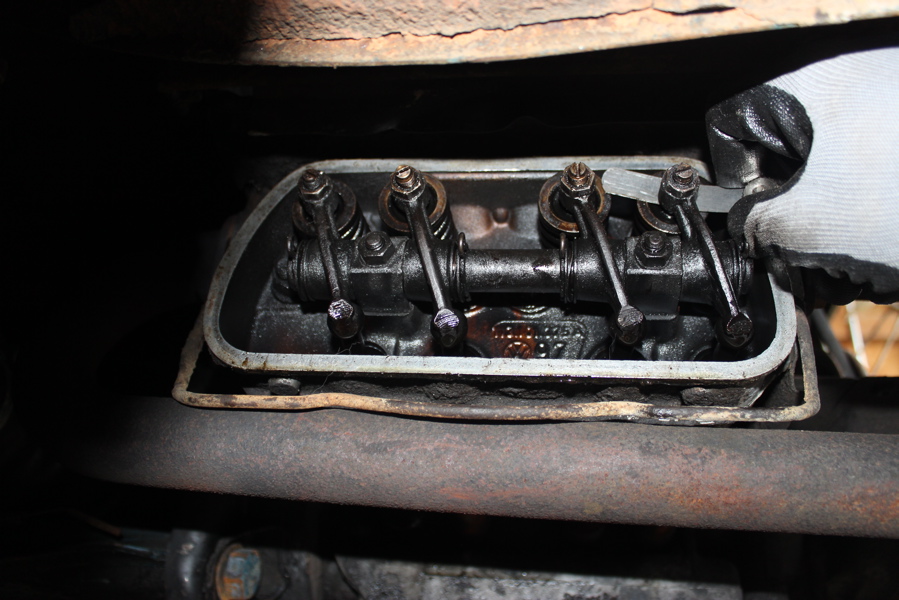
I then started adjusting the rocker valves.  There are two sets (one for intake, one for exhaust)  for each of the 4 cylinders.  At a point in the crankshaft’s rotation (TDC for cylinder #1), each respective valve set is fully extended. A tiny gap should exist between the rocker arm and the intake/exhaust valve.  The gap needs to be .006 inches, and its my job to turn the adjusting screw and locking nut until this gap is right.  To much gap and the rocker arm will slap against the valve head, causing a tickty-tock sound and eventually damage to the valve assembly.  Not enough gap, and the valves could stick, potentially causing massive internal engine damage.

My valves didn’t have any gap… at all… they were essentially fused directly to the valve heads – this is not good, and it makes me wonder if the previous owner knew what he was doing. I’m worried now that the inside of the engine is somehow messed up, or burnt out. I spent money for a bus with an engine that actually works; if i wanted a rolling shell I would have bought that instead, and paid a lot less – I guess I’m learning more than just mechanical lessons today! Ok, enough of my ranting – I adjusted each valve set to the proper .006″ gap (it took me all afternoon!).

Valves Open 2

Valves Hands 2

Valves Feeler Blade

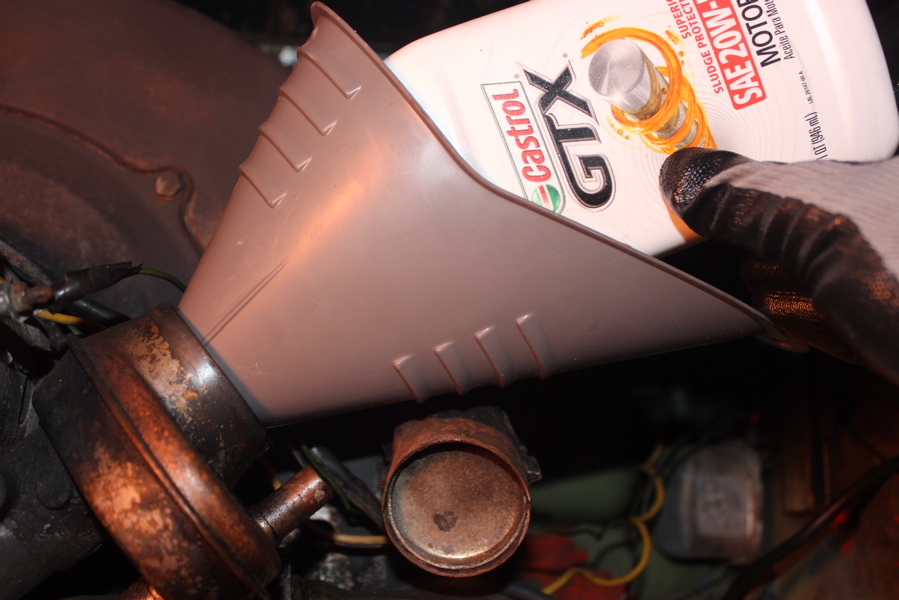
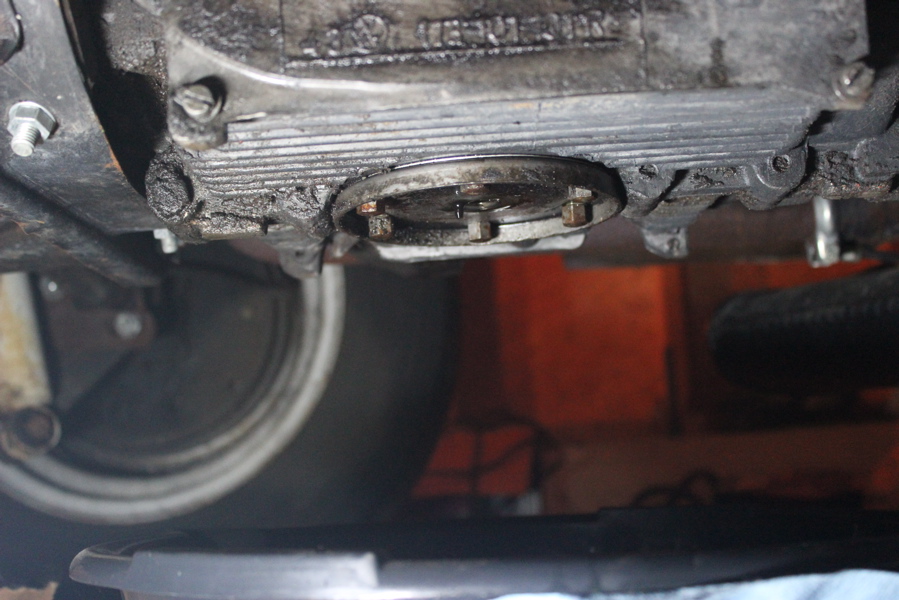
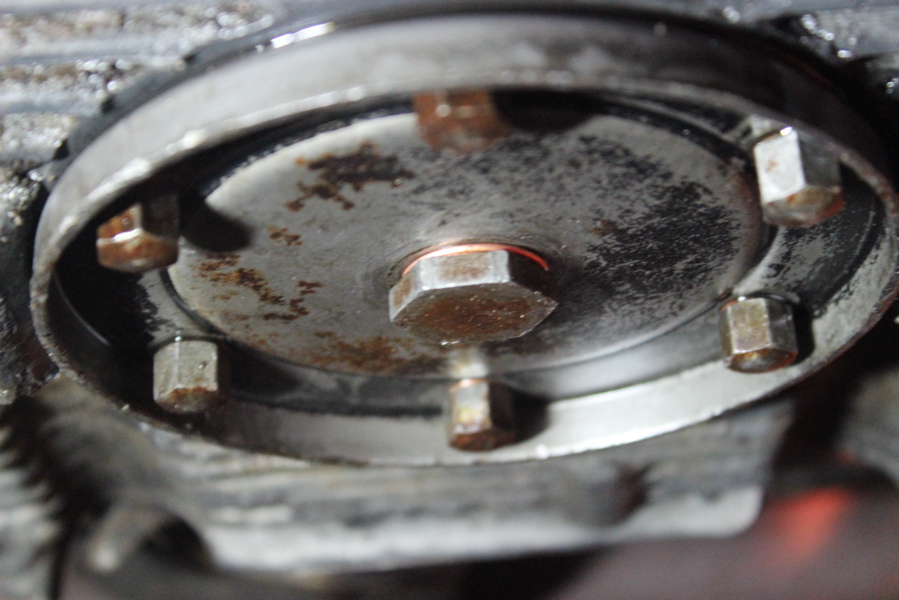
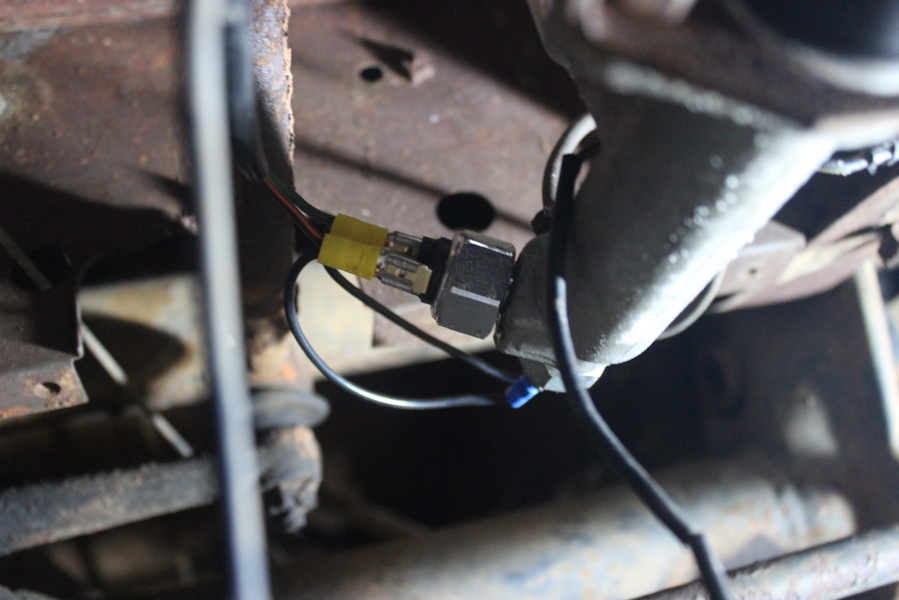
At this point, I’m ready to change the oil, but need to warm the engine up first.  Small problem, it doesn’t start!  It turns over a few times, but then dies off. As my frustration built, I kept trying the ignition.  Finally, I turned the key and had almost immediate ignition. Success! My newly tuned engine seems to run well; it does sound different now that the valves are adjusted, and the tighter fan belt seems to be helping.  My generator light is still on though, and when I revved the engine for a while, it died as I released the gas. I also noticed that the crankshaft pully has significant resistance as it rotates cylinder #3 and #4.  I’m thinking this is why it wouldn’t start, and could be really bad. Sounds like I have more issues to research!  I’m planning on changing the oil, and performing the compression test tomorrow.  I’ll probably check the valves again too.

Overall I’m glad the day went well.  I’ve never so much as looked at a car engine before this, and today I went in head first, got my hands dirty, and had a great time fiddling with the bus.  It’s not road ready yet, but at this rate it will be soon!

Engine 2


Uncategorized, VW

One Step Closer

Brake Lights 1

Brake lights work.  The bus is one step closer to being road ready, and this latest success is the reason why I am doing this project: Some time spent researching, lots of struggle, and ultimately success in the end!

I started on the brake lights yesterday by testing the wires leading to one of the two stop light switches.  They had juice, so I figured the switch was bad.  Good news is that they are cheap, and I found one in stock at AutoZone. Of course when I went to replace the old rusty switch nothing worked out.  I first tried to take it off with an adjustable wrench… it didn’t budge but instead the wrench got stuck to the point where for a minute I thought it might be a new addition to the underside of the bus. Wrench finally off, I tried to use the ratchet instead.  Stupid switch didn’t budge at all, so as usual I start banging things around, venting some frustration.  Finally I got myself scrunched up completely under the bus and was able to get the leverage to move the switch. Yes!  the rest was pretty easy, ratchet off the old switch, ratchet on the new.  I also replaced all the corroded wire connectors. Get back in the bus, notch the ignition on, press the brakes – Success! Now I’m one step closer to getting this thing on the road.  I’m thinking next steps are fixing the oil leaks/ potentially catastrophic engine failure, and problem-solving the battery issues/ generator warning light.

New Brake Switch

Brake Lights 2