Uncategorized, VW

Fixed the Leak! (Kind of)

Throttle Arm

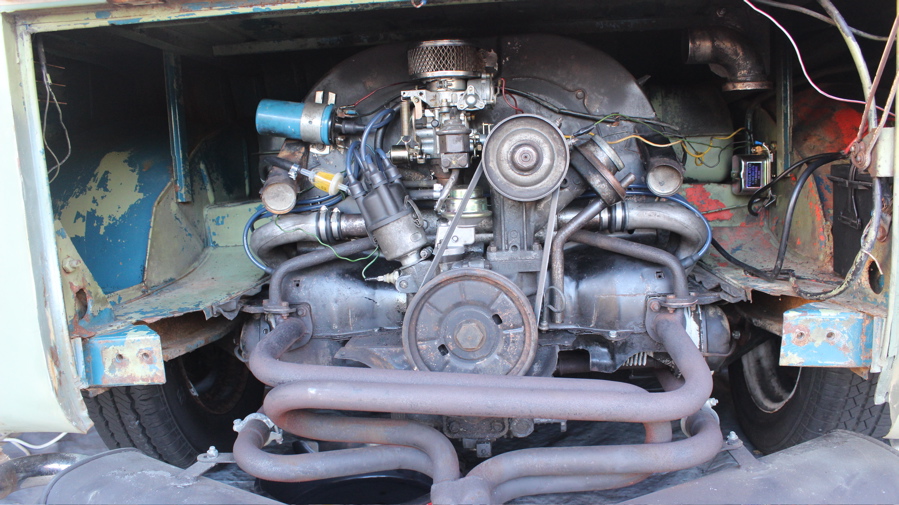
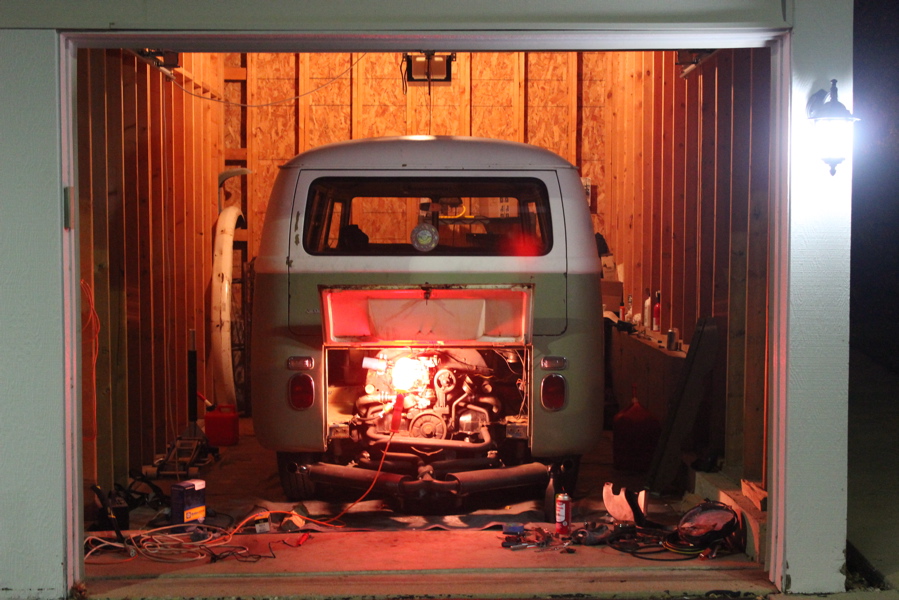
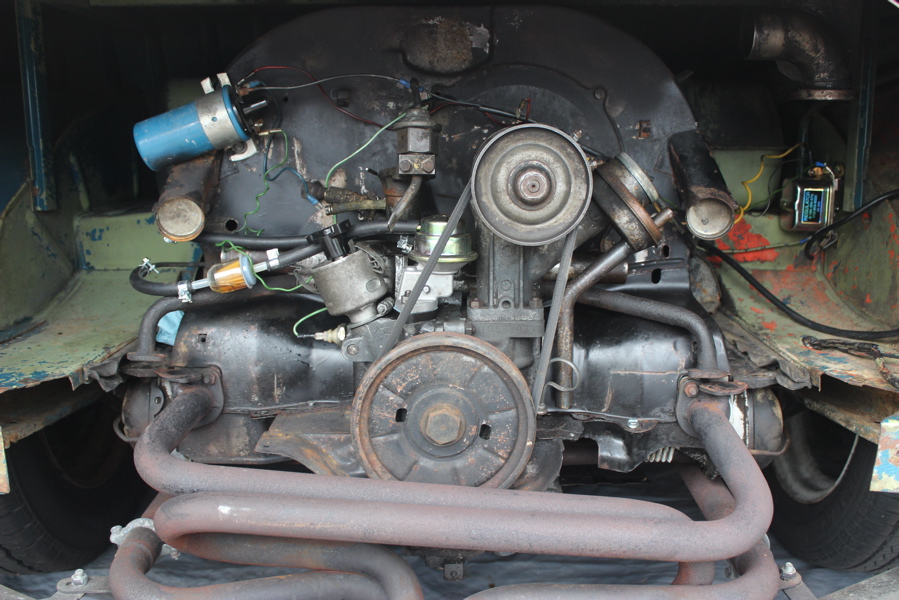
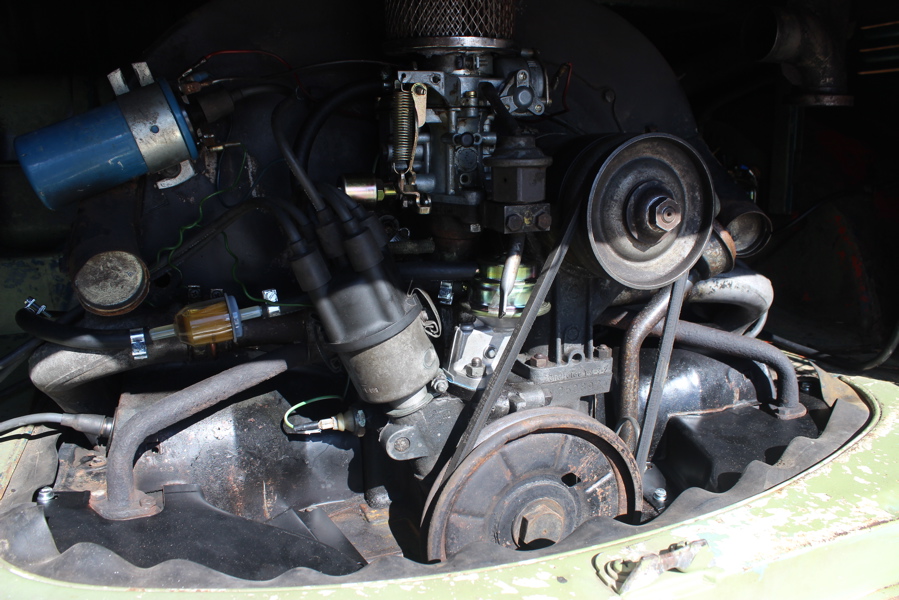
So I found the air leak that was causing the engine to backfire aggressively. I was pretty nervous that I would have to pull the whole intake manifold back off, but that wasn’t the case.  I also spent some time this weekend on a couple of non-engine related projects.

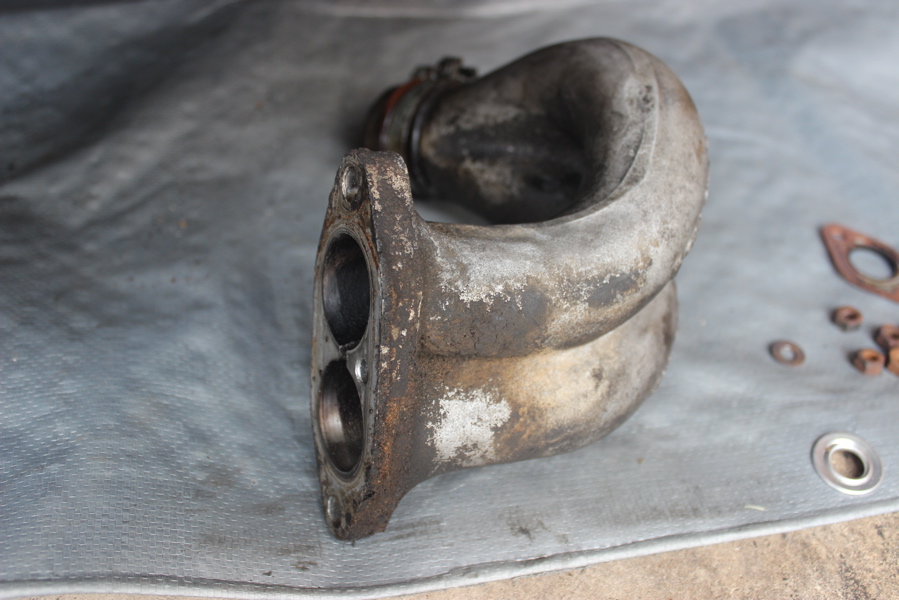
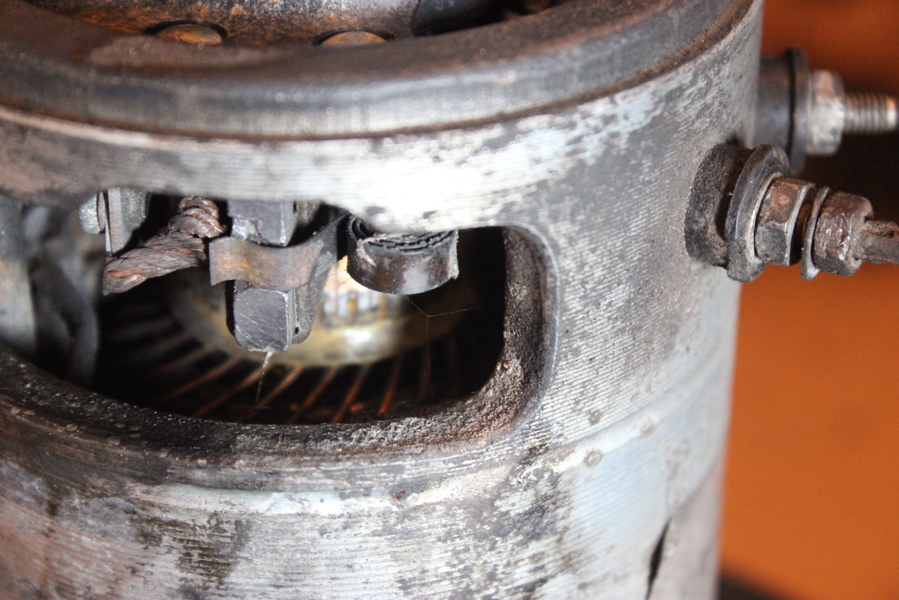
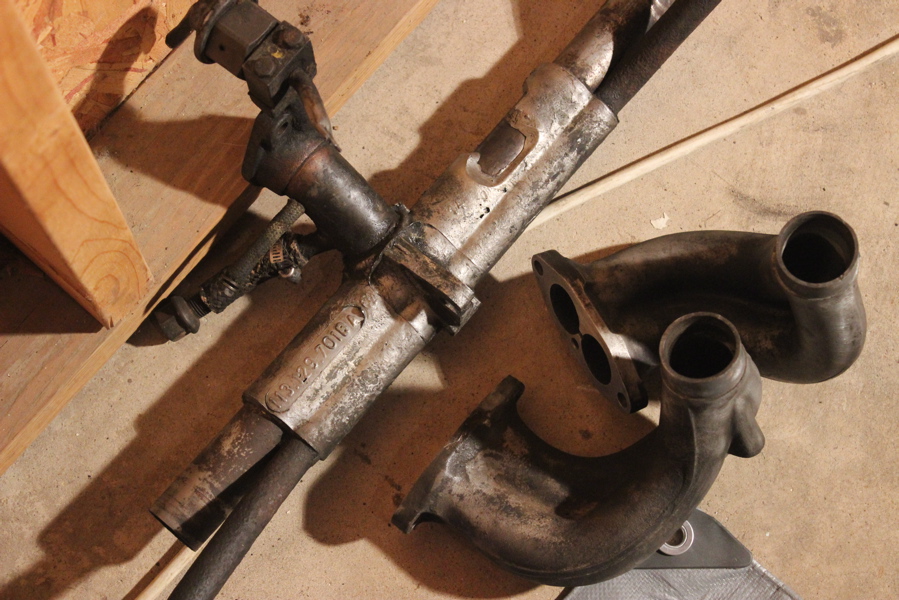
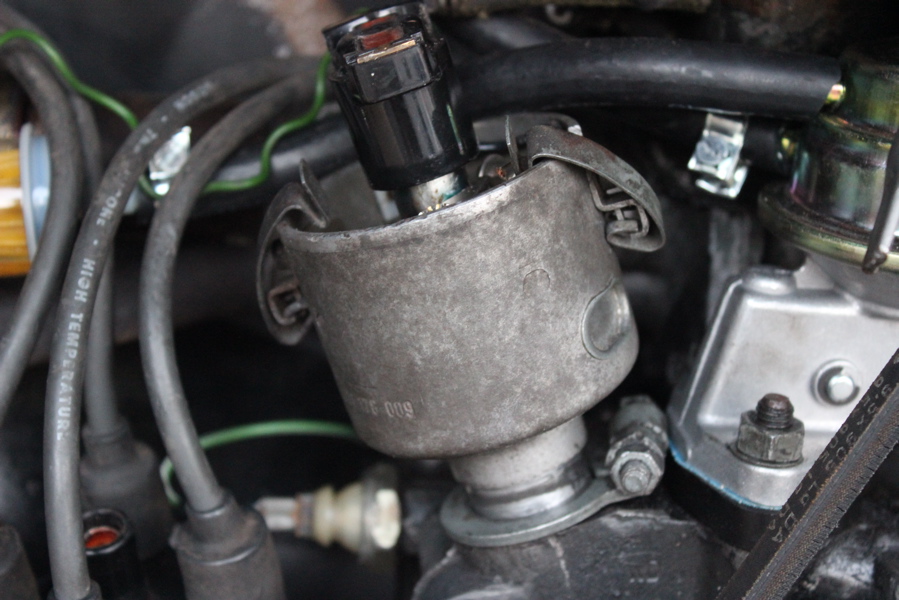
First, the engine – I loosened the heat risers, and right end casting, I wiggled it around a little, adjusted the rubber boot, bolted it back down securely.  Fired up the engine – its started right up and ran beautifully – Success! However, as soon as it warmed up, the idle became more erratic to the point that it died.  So it obviously still has issues.  It dies when the engine is warm, and can be difficult to start back up.  On Saturday, it died to the point that I couldn’t get the thing started back up – I gave up for the day, but came back renewed on Sunday!

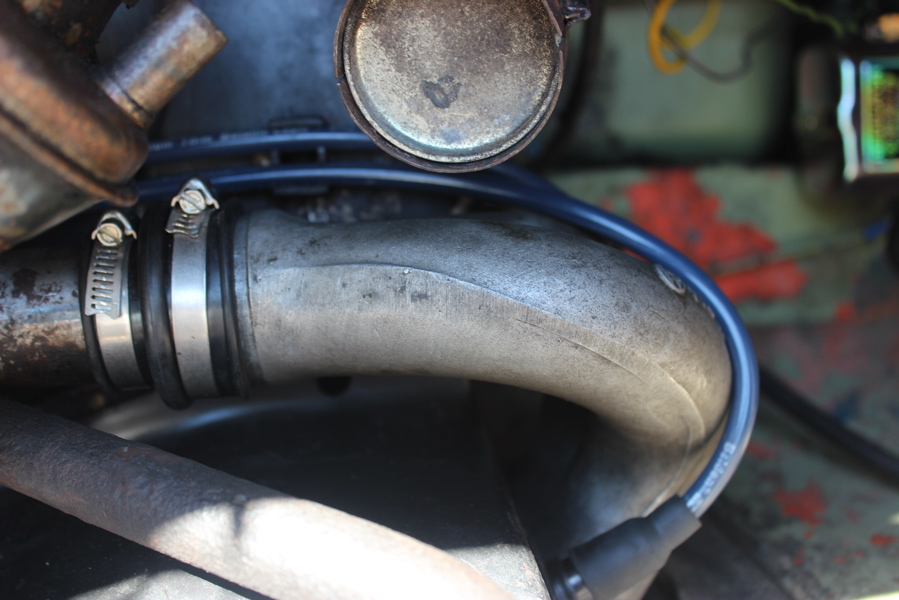
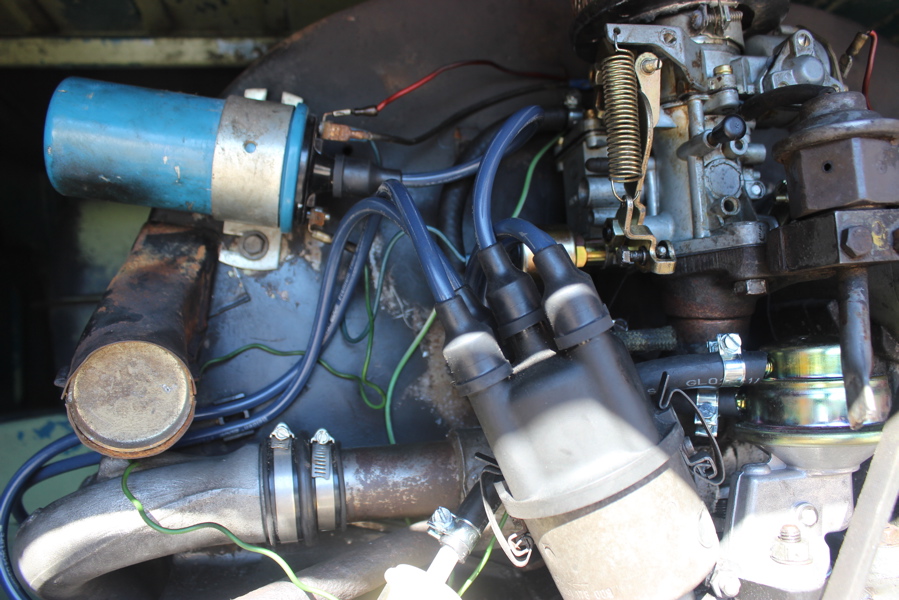
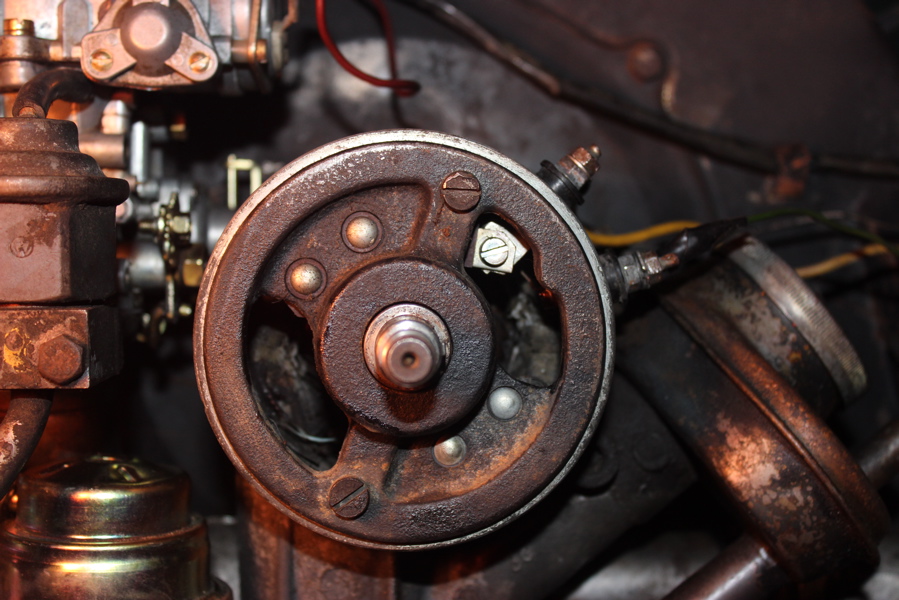
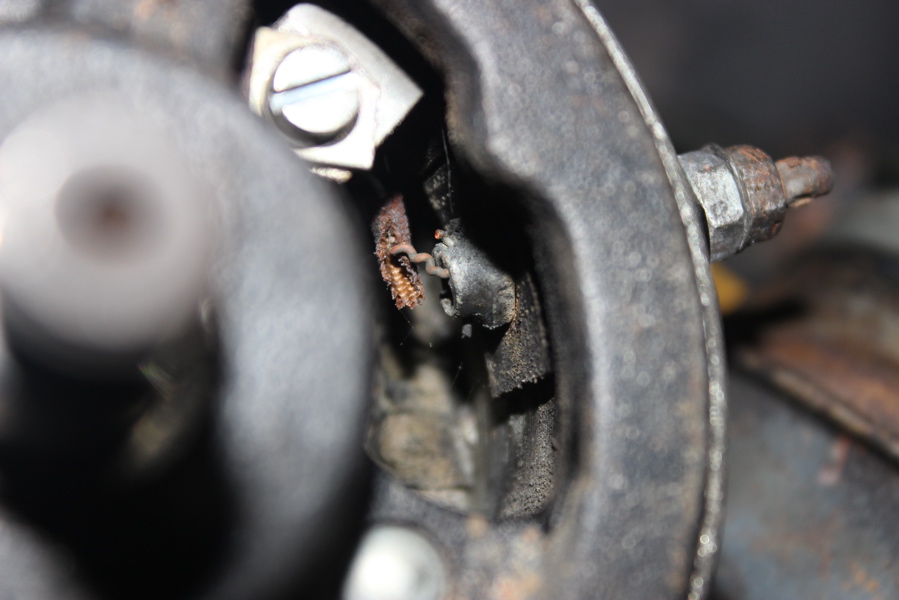
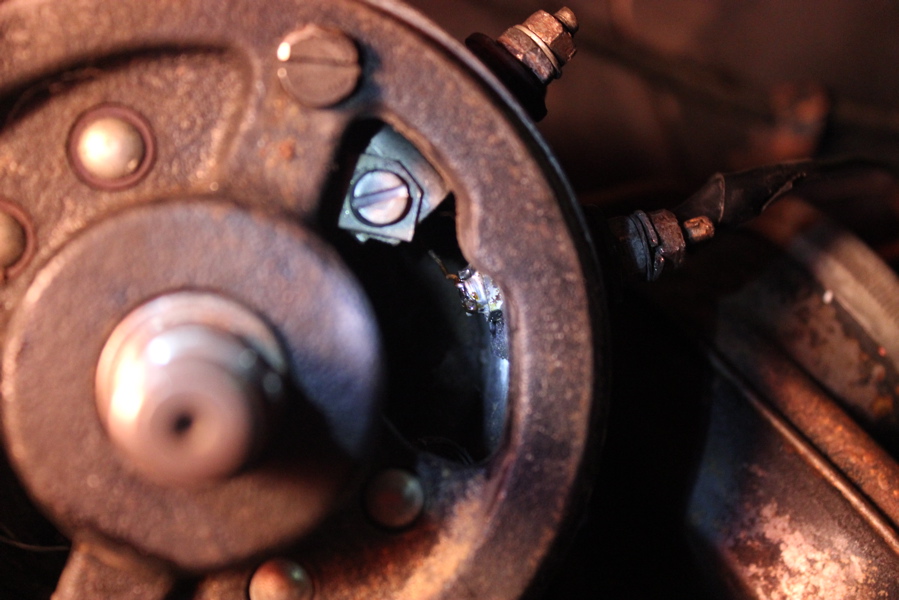
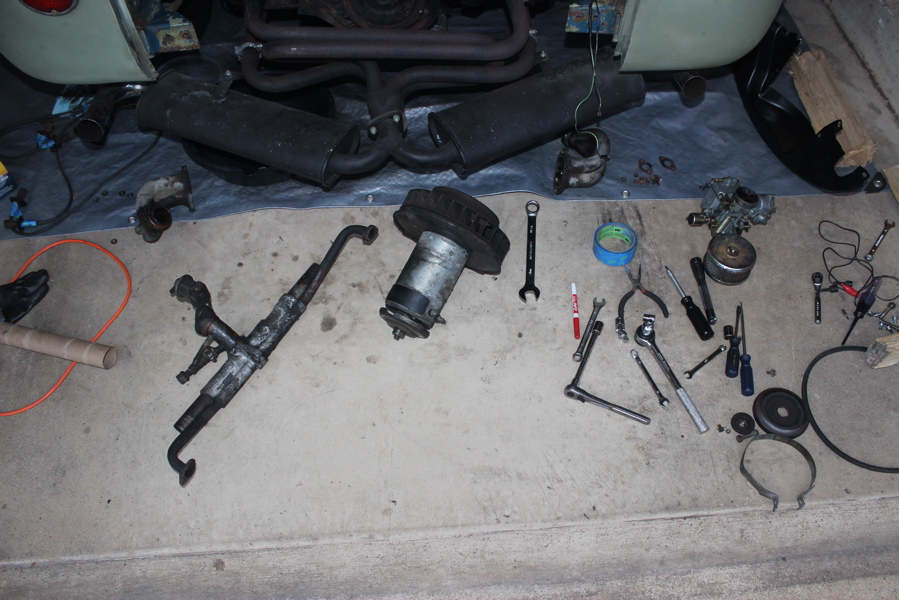
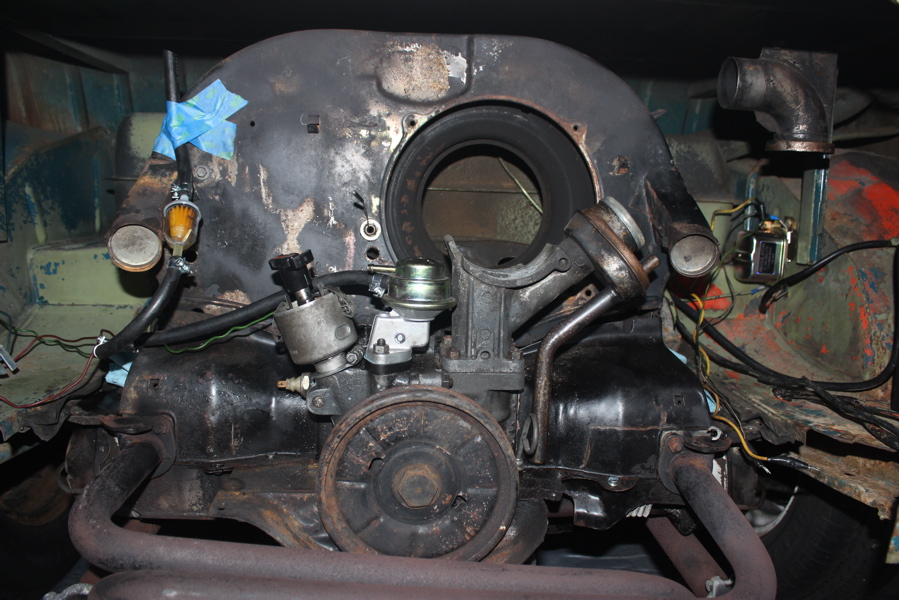
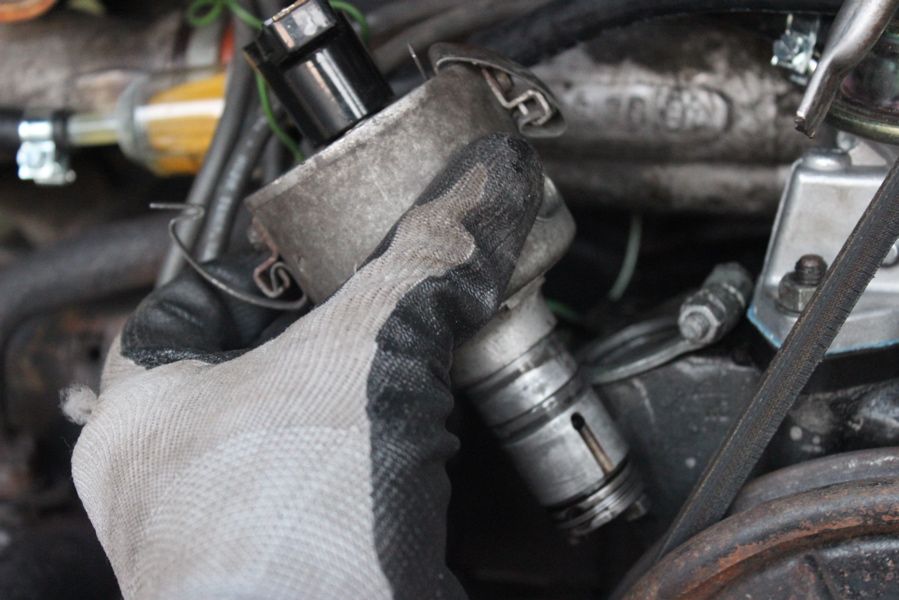
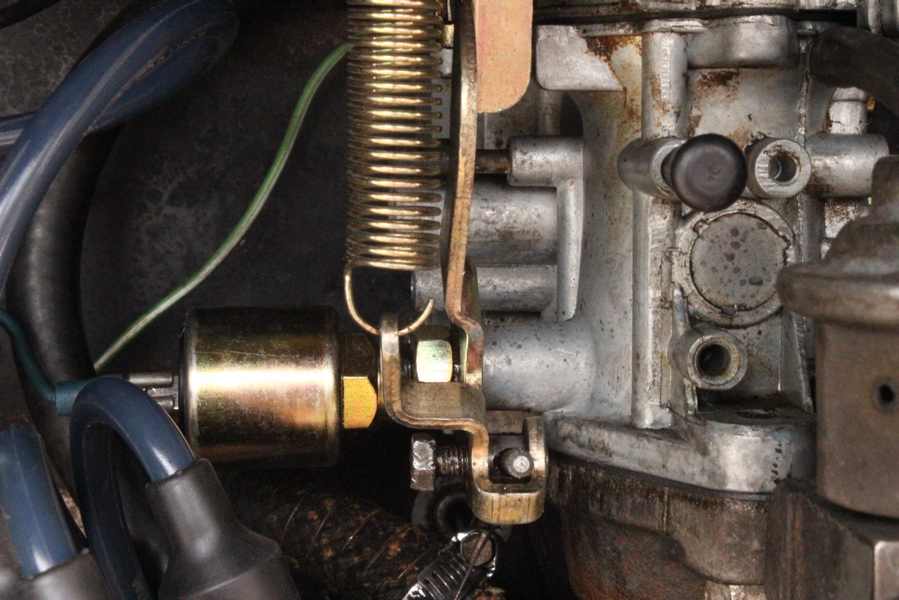
The bus still wouldn’t start, so I tried something new – spraying carb cleaner (starter fluid) into the carb fuel bowl.  This worked, the bus fires right up!  This probably means that I have some kind of fuel delivery issue.  I have a new pump, but I’m pretty sure there is gunk in the gas tank – I don’t know if this is causing all of my problems, or just adding to them.  Either way, as it was warming up, I sprayed that carb cleaner on everything I could to find any signs of vacuum leak – thats when I finally found it (them).  The engine revved everytime I sprayed the throttle arm bolt, and the two plugged hoses coming from the intake manifold.

Manifold Plugs

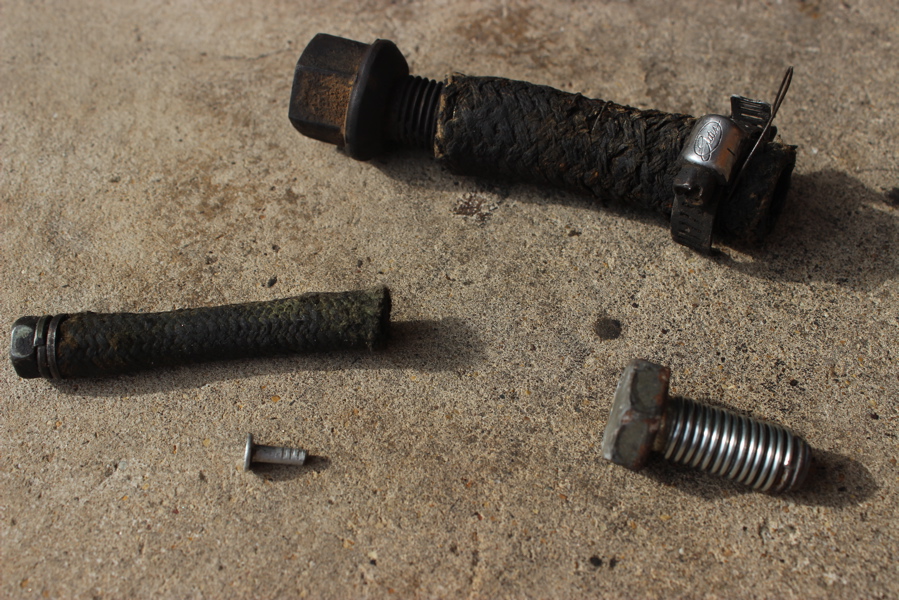
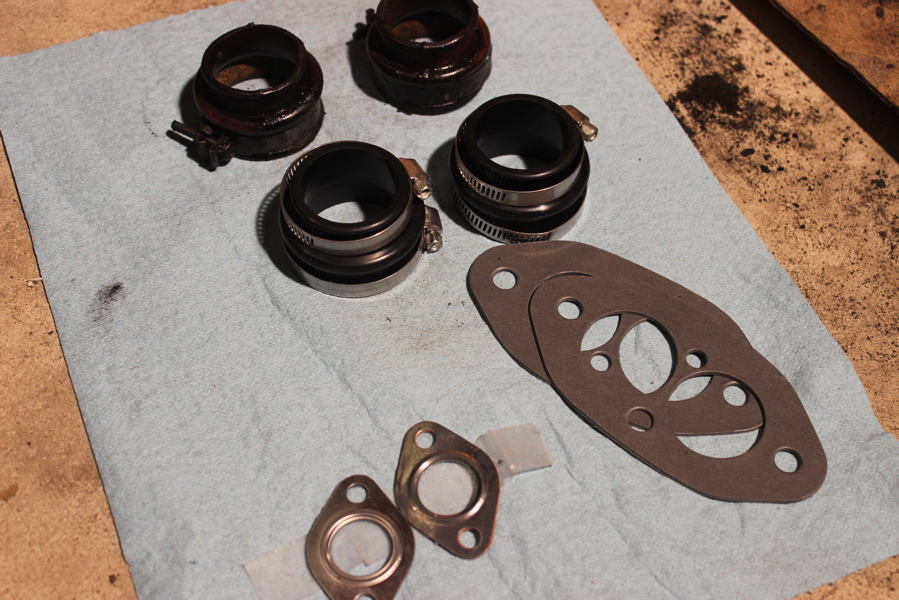
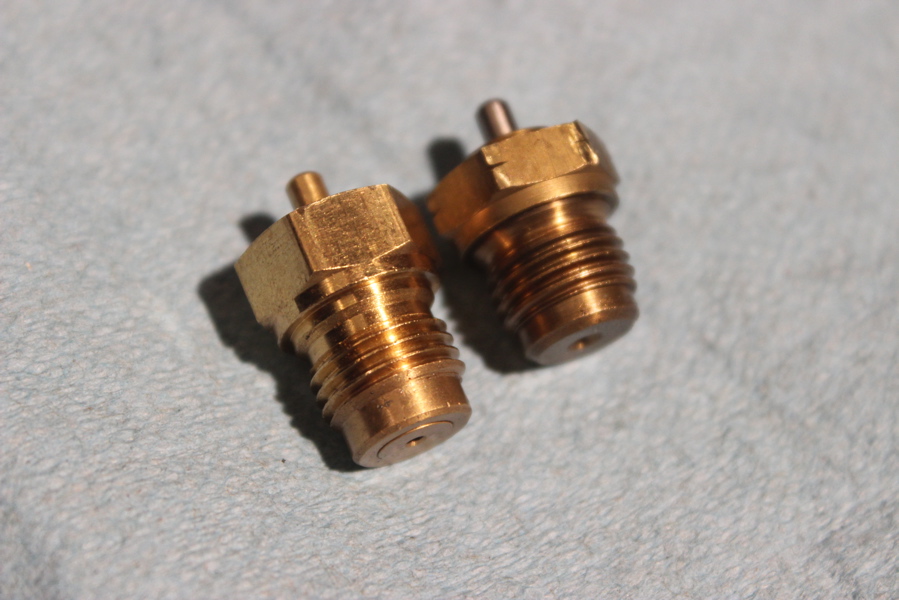
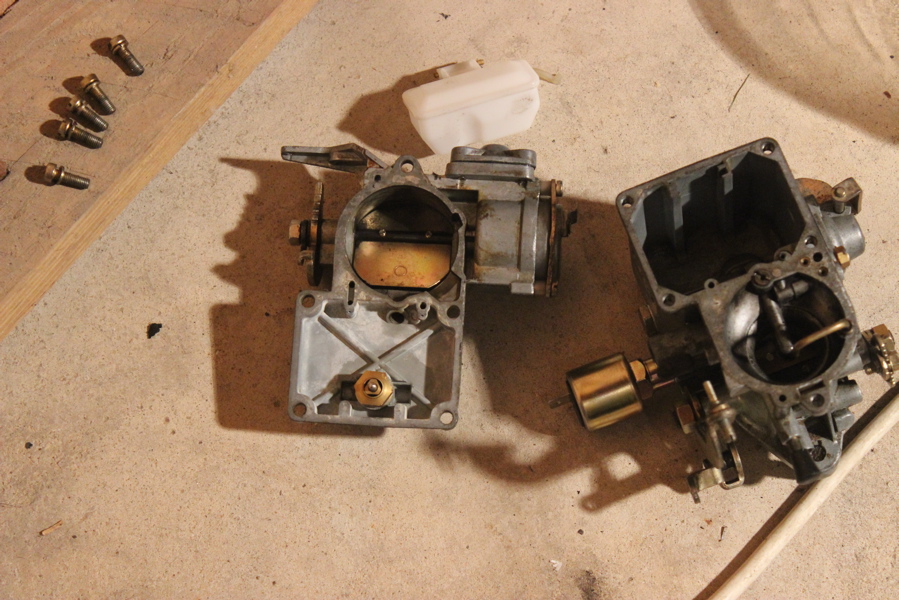
I removed the old hoses and tried to plug the manifold holes with these ingenious solutions – but of course that didn’t work – so I ended up cutting the broken ends of the old hoses, and reinstalling them with tightened clamps.  That definitely stopped the air leak there, however I still have the throttle leak.  According to my research a leak in the throttle area usually means the end of the life of the carb, but I’m going to pull the thing off and try one more time to clean it, and tighten everything up.  If that fails, I’ll be getting a new carb set-up!

E-brake Fixed

E-Brake Close

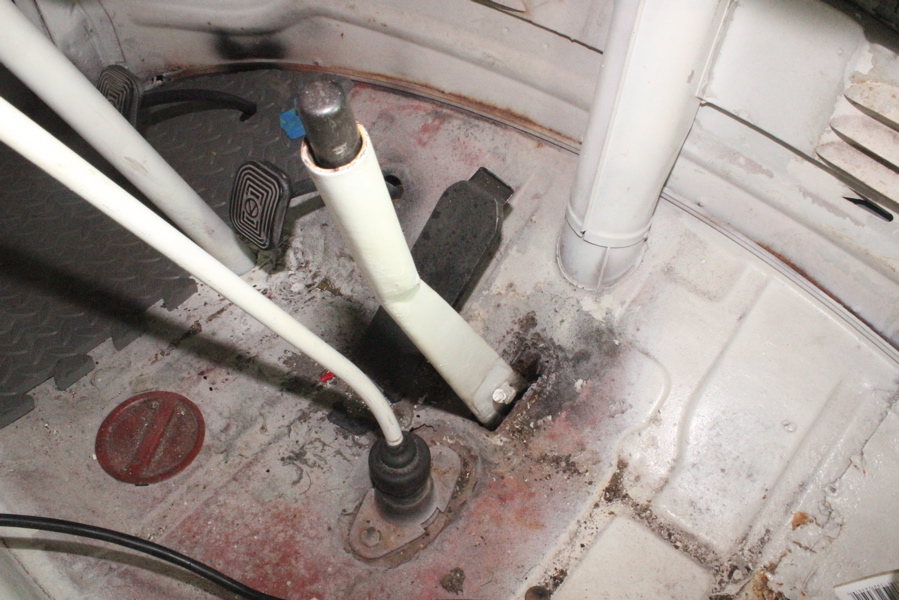
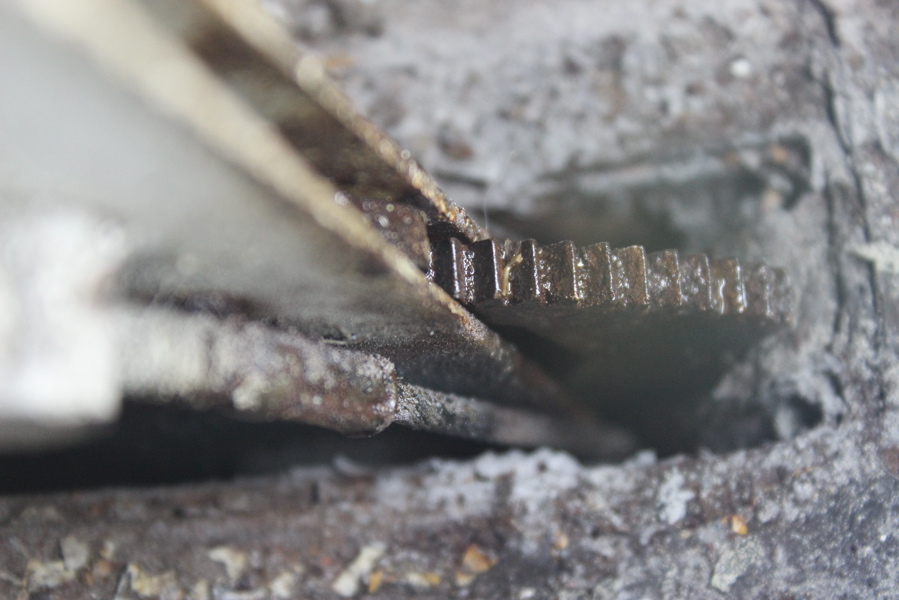
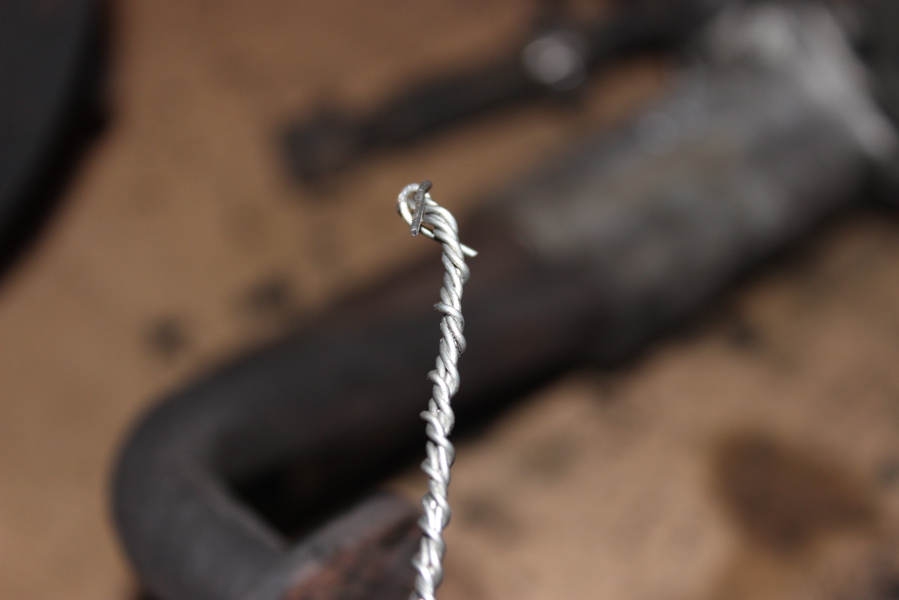
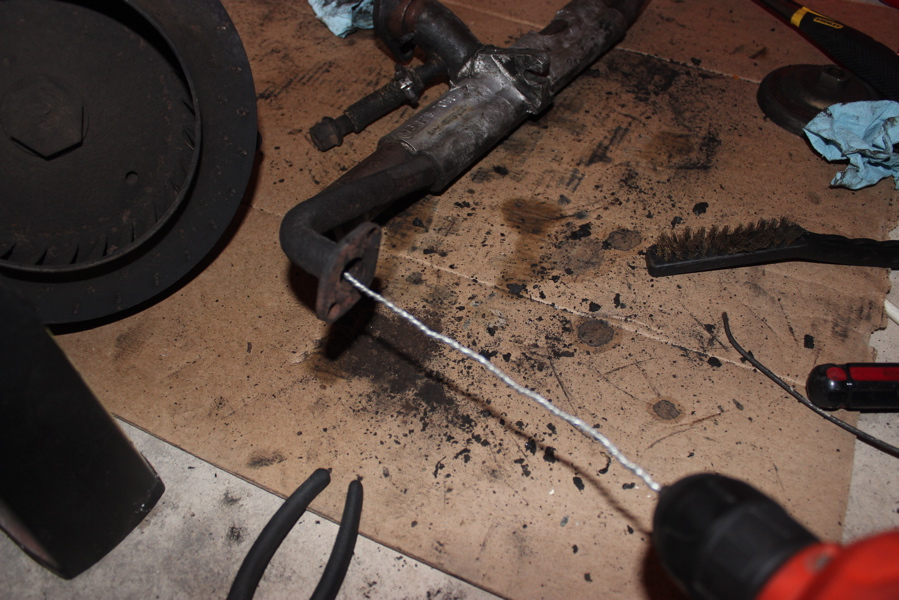
I also made some progress on the e-brake.  The little piece of metal in the handle wasn’t catching on the teeth at the base.  I sprayed penetrating blaster, and smacked everything around with the hammer.  That worked – I can now engage the emergency brake handle – progress!  Unfortunately, the cable ends aren’t actually attached to the rear brakes.  I don’t think re-attaching should be that complicated, however I would need to pull the back wheels off, pull the brake drum, and adjust the tension of the cables.  Given how difficult it was to get the back tires on and off (the bus has been lowered, and none of the rear suspension is stock), I will pass on that job for now – maybe get the shop to do it once I take it in.

Bus Bumper On

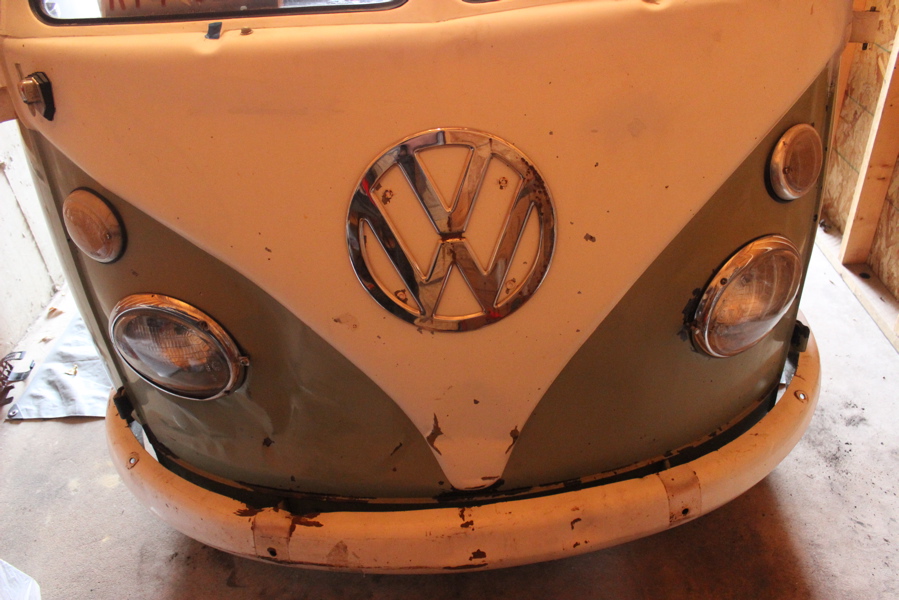
Finally, I tried attaching the front bumper.  By the end of the day, I have it on the bus, and it fits great!  The bumper itself has quite a few scrapes and dents, and is missing the front overrider tube gear.  I haven’t decided if I’ll try to restore that one, or just sell it and buy new.  I also struggled to figure out what size bolt is needed for installation (yes I looked in my Bentley manual – it mentions 8mm, but that didn’t seem to work).  Finally, a few extra bolts from an IKEA piece did the trick – go figure!  I’ll pull those bolts and see if I can find some automotive grade versions, but in the mean time I’ve got the thing looking good – Another fun weekend making tiny incremental steps towards a fully functioning VW camper bus!

VW

Found the Leak!

Cleaned Engine

Here’s another picture of my slightly cleaned up, and always tempermental air-cooled bus engine (actually a 1974 Super Beetle bastard engine).

Right Casting

I got the newly cleaned intake manifold back on, complete with new rubber boots and heat riser gaskets.

Old Spark Wires

Broken Spark Wire

New Spark Wires

Left Casting 2

I also replaced the spark plug wires because they were looking rough, and one of the connectors had broken off as I pulled it out of the distributor cap. The new ones have rubber ends that make a really nice seal against the engine case – I’ve heard this can lower the operating temps.

Everything is looking good, so I decide its time to start this bad-boy up!  Unfortunately, the engine immediately started backfiring.  I rechecked my timing, made sure my new spark wires were hooked up correctly, and tried to tighten everything down.  I got it to run a little, but it still backfired a lot.  Eventually, I figured out that I have air leakage coming from the right end casting.  I will try loosening it, and refitting to the cylinder heads – hopefully I can get the engine running well in a matter of days!

I made another thrilling video documenting my struggles, which helped me diagnose my latest round of engine trouble – enjoy!


Uncategorized, VW

Generating New Problems

Generator Broke 1

I’m working to get the engine put back together.  I’m really hoping I can get this thing to work soon; I want to be driving around before the Chicago weather takes a turn for the worse (and then stays there for 5 months).

I started putting the manifold back on.  The gaskets that came with the new rubber boots to connect the end castings to the cylinder heads don’t fit… at all… but the original aluminum gaskets are still in place. I eventually got everything to slide into place, and snugged down securely.  It’s very possible that something on the manifold was causing my vacuum leak, and the cleaned up parts look solid.  I then moved on to the generator – got it shimmied back into the fan shroud, and strapped down.  I filled the carb bowl w/ some gas, replaced the top, and placed it on the manifold.  After dropping the front tightening nut underneath the newly secured manifold (and spending like 2 hours trying to get it out) the carb was set up and ready to go.  The last step was to reconnect the electrical wires to the carb and generator – easy!

Generator Broke 2

Except that as I tightened the DF ground terminal on the generator I heard a SNAP, and the thing started spinning around with my wrench…uhoh… I broke the little wire inside the generator that grounds it to the voltage regulator. Not good! For a second I freak out – I’ve just spent all night putting these stupid engine parts back on, this was the last step and it should have been easy, I don’t know what I’m doing, I can’t do this!! Ahhh!!

Solder Iron

Generator Fixed

Ok, so after I went inside in a huff, I realized that I can probably fix it fairly easily by re-securing the terminal, and soldering the little wire back to the connector end.  So thats what I did – I’ve never soldered before, but I bought a little soldering iron a while ago – watched a couple YouTube vids and went to town.  It probably isn’t the prettiest solder job, but it seems to have worked.  I hooked the generator up to the battery to polarize it, and it spun around quickly, just like it was supposed to. Success!  I carefully attached the voltage regulator wires and called that project complete.  I’ll finish hooking everything up, and finally test the engine this weekend.

Bus at Night

This picture is pretty much every night for me right now, but honestly, I can’t complain.  Even though this bus has been one problem after another, I have thoroughly enjoyed working on it, and learning everything as I go. While I’m spent most of my time troubleshooting and fixing, I’m really looking forward to the day when we’re out there road-trippin to some campsite!  My motto: Keep calm and carry on!

Uncategorized, VW

No More Messing Around

No Messing Around

As of right now, parts of the engine are in pieces around the garage, I’ve spent the weekend covered in grime and carbon soot, and I’m getting ready to put it all back together again… I’m not messing around!

Last weekend, I was able to get the bus up and running again after correctly re-installing the distributor.  However, it still had the same problems it had before – no idle when warm, unless idle screw very loose, stalling when braking, and extreme hesitation when shifting gears.  On top of that, it also doesn’t want to start back up after it dies – to the point where I had to push the stupid bus back into the garage (with a running start)… Clearly whatever I did with the carb rebuild and fuel pump/ line replacement has not solved any issues, and may have made things worse!

New Manifold Gaskets

To remedy this, I decided to try again to pull the intake manifold out.  This will allow me to clean it up, and replace the rubber boots and heat riser gaskets.  I bought a universal socket drive that can flex any direction, and went to town trying to pull the thing off.  An hour or so just to get the manifold end castings unbolted – I read online that this would be difficult, especially with the engine in the bus, and they weren’t lying.  After a while, I was sweating, covered in grime, and had finally gotten the castings loose – but they wouldn’t come out.  There just wasn’t enough clearance to slide them up and out – I’m starting to think that the VW engineers who came up with this whole setup were crazy!

End Casting Dirty

I was able to get the castings off by lifting the fan shroud slightly – ok good, now I should just be able to slide the manifold out.  But it won’t fit, no matter how I wiggle it and jimmy it,  the heat riser tube wedges against the generator, and it won’t come out.  So I need to take off the generator… which is bolted to the generator stand… and is attached to the fan… which is in the fan shroud that needs to be unbolted and lifted up about 3 inches to give everything enough clearance to slide out… whew! This is a lot of work. Ok, fast forward to the end of the day – I now have the generator & fan out, the intake manifold off, and I’m ready to start cleaning everything up… but I’m tired so it can wait for tomorrow!

Engine Teardown 1

Engine Teardown 2

I spent the day trying to get everything cleaned up.  I started with the generator – the fan is actually in good shape – no bent fins, and its clear of debris.  With the thing off of the engine, I’m able to get much better access – I spray it throughly with my electric contact cleaner.  It looks filthy inside, so hopefully the cleaner will remove some of the gunk.

Generator 1

Fan 2

Generator Close

I then moved on to the intake manifold.  I suspected the heat risers were clogged with carbon – this means the manifold will not heat up properly, and could be causing some of my engine issues.  I made a braided wire, attached it to the drill and went to town.  I got a lot of debris out of the heat risers with this method, but couldn’t get the wire to go all the way through – if I made it too long, it would snap off.  So I resorted to my usual… bang the thing with a hammer!  That actually seemed to work – chunks off carbon came trickling out.  I set up my mobile tire pump to blow in one end, and felt the air coming out the other end of the tube – I’m going to call that a success.

Manifold Wire

Clearing Manifold

Cleaning Manifold 1

I also wanted to clean the end castings and exterior of the intake manifold.  Technically, I should have gotten some mineral spirits or some other type of parts cleaner, let them soak for a day, and washed everything thoroughly… but thats a lot of work!  So instead I put my light grinding wheel on the drill and went to town – it did a decent job of getting the chunks of crud off, and really shined the parts that connect to the cylinder heads… so I’m calling it good.

Carb Valve Differences

Carb Cleaning

Finally, I noticed that the carb didn’t have any gas in it when I pulled it off the engine.  Thats probably why it wouldn’t start!  I noticed that the new float valve seems to be sticking a little.  I pulled out the old one, and noticed right away they are very different.  The old one is smaller, and will therefore sit higher in the carb, letting more gas in.  I put it back on, and hopefully this will solve my non-starting issues.

Cleaned Manifold

By the end of the weekend, I’ve made a massive mess, and torn apart the engine.  I’ve got everything set up to be put back together, and I’m hoping for the best.  I’m not messing around with this stupid engine anymore!  If this doesn’t solve my problems, I’ll be pretty frustrated, but at least I will have tried everything I could – I will probably end up buying that  new carb kit after all – more to come!

Uncategorized, VW

Square One?

Rear Engine Tin Complete 2

Another week, another post detailing how I almost got the bus working.  The short story is that I figured out why the stupid thing wouldn’t start – got it running but it still has idle issues, dies when braking, and has severe bogging when shifting or accelerating – oh, and it doesn’t want to start very easily after its warmed up.  So after pulling and cleaning the carb, replacing the fuel lines and fuel pump, and prodding/poking about every other thing in the engine compartment, I’m pretty much back at square one.

Dizzy 1

Dizzy 2

I was pretty nervous that I had somehow destroyed the engine at the beginning of the week because I could not get the bus started at all.  I eventually figured out why: the distributor that I had to pull out to get to the fuel pump bolts wasn’t going in all the way.  So as the starter turns the engine, the stupid rotor arm thing in the distributor doesn’t close the points, and so no spark is generated – I know its pretty much rocket science…  I did some researching and realized that I needed to get the engine set at #1 firing position, or top dead center (TDC) before putting the distributor back in.  Usually, I look at the rotor arm in the distributor to tell me if I’m at TDC, or if I’m at #3 cylinder (they are 180 degrees opposite) – obviously with the distributor dangling off the side of the engine, I had to look at the valves to make sure I was in the right position.  So – everything lined up, I slide the dizzy into the engine – and it still wont go all the way down.

Chunks

I pull it out, and look down the hole with a flashlight – there’s chunks of something in there – uh oh! Now I’m freaking out – I’ve really done it this time – stupid bus. I proceeded to engage in some quick VW brain surgery with some needle nose pliers, and pulled the chunks out.  I have no idea where they came from, or what they are, but I don’t really see any damage to the crankshaft, distributor, or anything else. To top everything off, the distributor still won’t go all the way in. I’m no closer to getting the bus going – I’m done with this, going inside – stupid bus!

Ok, I come back out the next day and quickly realize my mistake – I was misreading the valve movements, and had the engine set at #3 instead of TDC.  I crank it around 180 degrees and the distributor drops right in – sometimes I’m amazed I can even make it out the door in the morning.  A couple days and a few stress points later and the bus is up and running again! Success! 

Rear Curtain

I cleaned the underside of the rear curtain using a light grinding wheel with my drill – it was fairly effective, so I think I’m going to try that technique on the rust and grime on the underside frame of the bus – tons of fun for sure.

Rear Tin Complete

Rear Tin Close

I attach my new rear engine tin plate, and put the rear curtain piece back on.  The engine compartment is now fully sealed from the underside of the bus, and I can already tell that this will help with the heat – it will no longer suck hot air from under the engine back up into the compartment.  Interestingly, I’ve also noticed that it’s quite a bit hotter to stand behind the bus – I guess all that hot air has to go somewhere.

Not everything is fine and dandy though – I can still hear the hissing, sucking noise that I heard before, and the engine still doesn’t idle well when it is hot.  It will run if I unscrew the idle control screw a bunch of times, but even this is erratic.  Its about 50/50 if the bus will die when coming to a stop, and it still has massive hesitation whenever I accelerate.  This only happens while I’m driving though, it accelerates just fine if its in neutral sitting in the garage.  In addition to all of this,  the bus is really hard to start once the engine has warmed up – to the point that I had to push it back into the garage!

Timing Marks

Timing Strobe Light

In an attempt to remedy these issues, I tried to set the timing with my new strobe timing light.  It didn’t really work though because I couldn’t see the degree marks on the pulley – I might try to re-mark them with white-out or something more visible.

Bleeding

It wouldn’t be a project if I wasn’t bleeding right?

Gas Tank Breather

I also noticed that the gas tank ventilation tube was clogged with sand – I was able to clear it by hooking the vacuum up to my flexible plastic funnel and clearing the little hole by the gas cap.

I’m also wondering more and more if I should just cough up the cash and get a new, improved Weber 40 carb kit with new intake manifold.  This would most likely solve all of my problems, and I would be able to transfer the set-up to a new engine in the future.  Everything I’ve read says these are the best, but its pricey, and I’m not 100% sure the thing will even fit in the engine compartment!

Rear Engine Tin Complete 2

Overall I’m happy the engine is back up and running.  I’ve kind of come full circle and I’m back at square one, but I will keep messing around until I get it to work – or until it falls apart!